Cheating on Stranded Colourwork with Duplicate Stitch
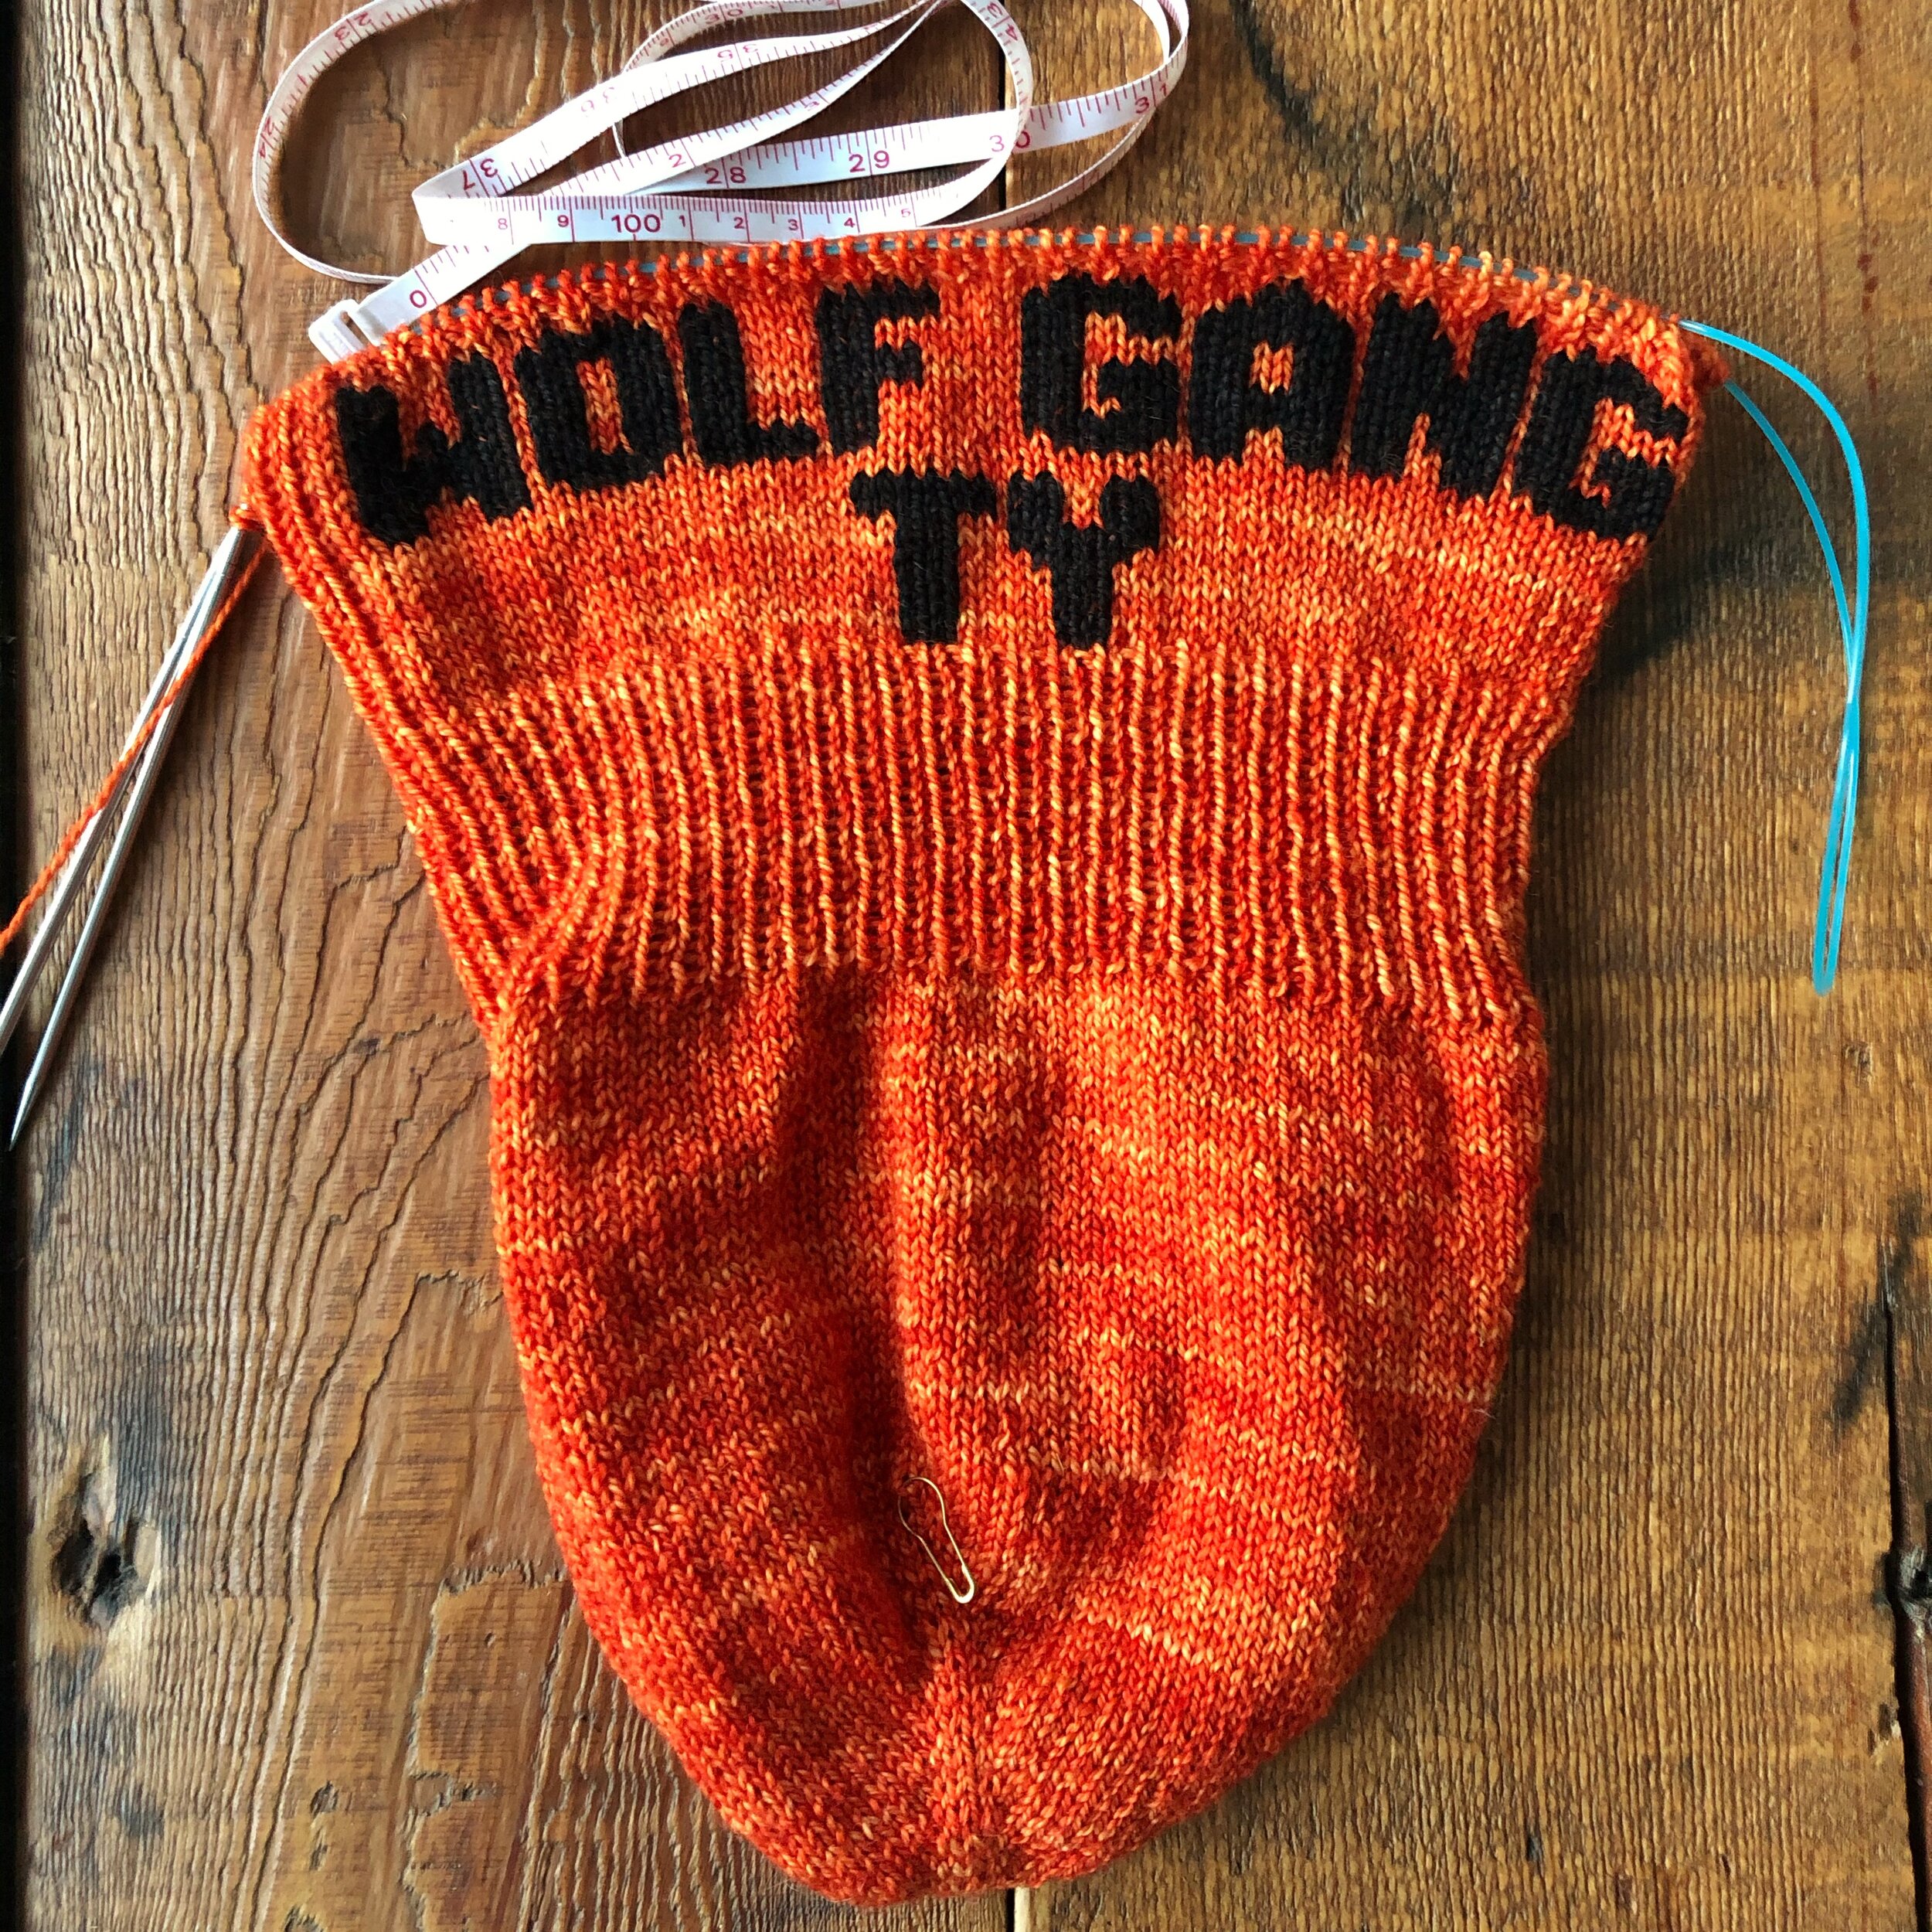
Half knitted “Wolf Gang” hat, showing duplicate stitch text.
When I was asked to make this toque, it took a lot of thinking about how to do the colour work sections. First thought - hat, knit in the round, perfect for stranded colourwork. Time to swatch!
So, I started the lettering, and was like “oh crap”. What the heck should I do with the black strand for the 100 stitches I don’t need it for? I tried 2 colour ribbing…but it’s not stretchy like normal ribbing, so that was out. I tried catching the black every 6 stitches, and it was showing through the orange, so that was out too.
A couple days later I remembered a cursed pair of mittens that called for some stitching to be done after the fabric was knit. I never finished those mittens by the way hah.
So, I Googled duplicate stitch. Purl Soho has an excellent tutorial, so check that out if you’re interested.
https://www.purlsoho.com/create/duplicate-stitch/
Perfect solution!
With some math, some diagrams to help spatially orient the stockinette text panel, and half a day of Netflix, I knit a whole bunch.
The duplicate stitch worked out well. I would definitely recommend a slightly thicker Duplicate Yarn than your main yarn, just to make sure you get good coverage of the stitch underneath. Otherwise you may get a bit of poke through of the main colour from underneath.
WOLF duplicate stitch text, with a bit of the main orange colour showing through.
I will keep this technique in my arsenal, definitely handy in situations like this.
But…I can’t help feeling like I cheated! Stranded colourwork is a tricky thing to learn, and this duplicate stitch was pretty easy. Oh well, just don’t tell anyone it’s not as hard as it looks ;)
Pattern Notes
And if you’re wondering what the heck this hat and pattern are all about… my cousin’s kid lost his special hunting hat and this is a re-make. Luckily his brother had the same hat, so I was able to copy the moose pattern and lettering. I used Andrea Rangel’s pattern for the Full Spectrum hat to knit the two-layered hat. I extended the ribbed brim section to get a fold over, and made a 60 st x 25 row stockinette panel in the middle of the ribbing for the “Wolf Gang Ty” text.
Dyeing Notes
This yarn is a 17 micron merino 2 ply, commercial spun, 115 g skein. I get most of my commercially spun yarn from Acme Fibres in Toronto, because they deliver pretty quickly and I usually try to support local if I can (relatively local - Northern Ontario is far from everything!). These guys leave the spinning oil in, so I always wash with Dawn in hot tap water before dyeing. After an hour soak, off to the dye pot.
For the both the bright orange and black, I dyed in a pot of water. Add the dye first, then swish to disperse, add the fibre, bring up to temp, then add acid and just about boil it for 1-2 hours. Allow to cool in its own time. Water is usually clear within 20min of adding acid. I always wash out in hot water + Dawn to ensure the dye is fully absorbed. There should be no or very faint bleed into the washing water.
Orange = 89mL 2% Sun Yellow + 35 mL 1% Magenta + 5 mL 1% Red (almost 2% DOS)
Black = 200 mL 2% Black (about 4% DOS… yup it’s black!)
I use ProChem Dyes, and have only warm (red, mustard yellow, blue) & cold (magenta, sun yellow, turquoise) primaries, black, brown and navy.


